Here we show you step by step how the Digital Proof of Life process works.
Digital Proof of Life – step by step
You need:
A smartphone or tablet with a stable Internet connection
"Digital Proof of Life (DLN) 2026" letter: this must be your personal letter containing your name. If you have received more than one letter, you must complete the Digital Proof of Life for each letter
Valid photo ID
E-mail address
POSTIDENT app from the Google Play Store (Android) or Apple App Store (iOS)
How to complete the process:
-
-
Generate the 12-digit case number
-
-
1. Scan the QR Code
Open the camera on your smartphone or tablet. Focus the camera on the QR code from your personal "Digital Proof of Life 2026" letter.
A link will appear on the screen.
Please note: The QR code can only be used once.
-
2. Tap on the link displayed.
If no link is displayed:
Focus the camera on the QR code without taking a photo.
Do not scan with the POSTIDENT app.
Use a special app for QR code scanning.
-
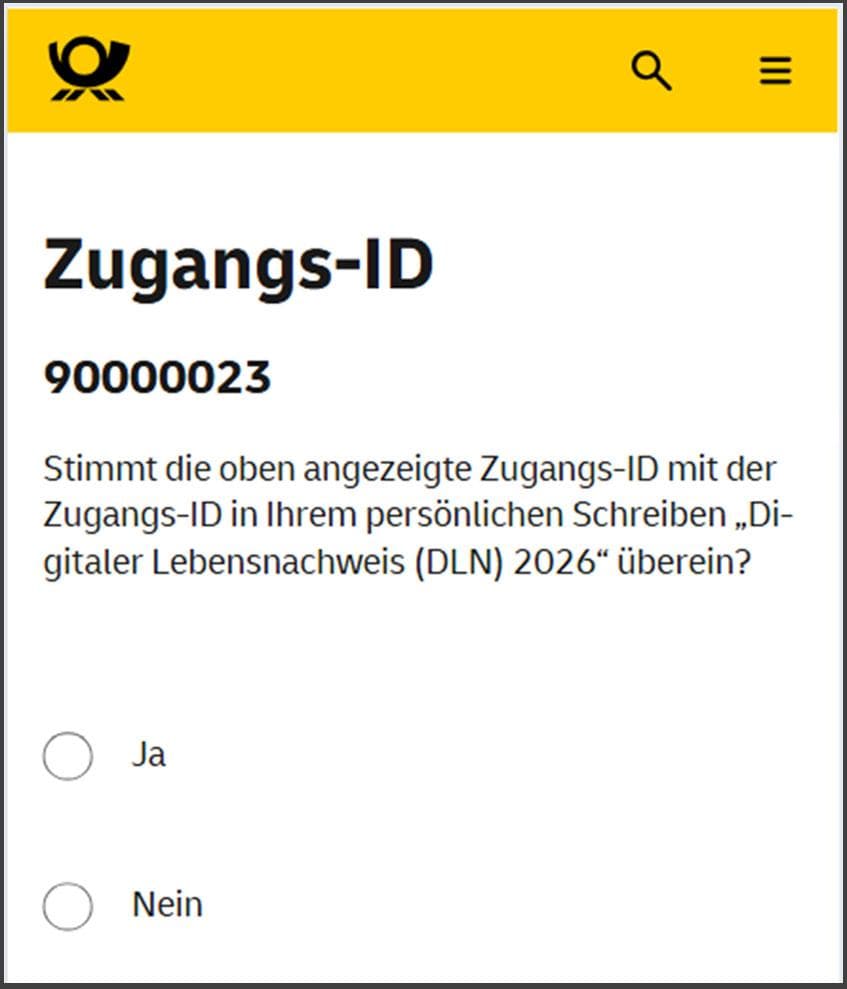
3. Check access ID
Compare the access ID displayed with the access ID in your personal letter "Digital Proof of Life (DLN) 2026".
Make a selection and follow the instructions.
-
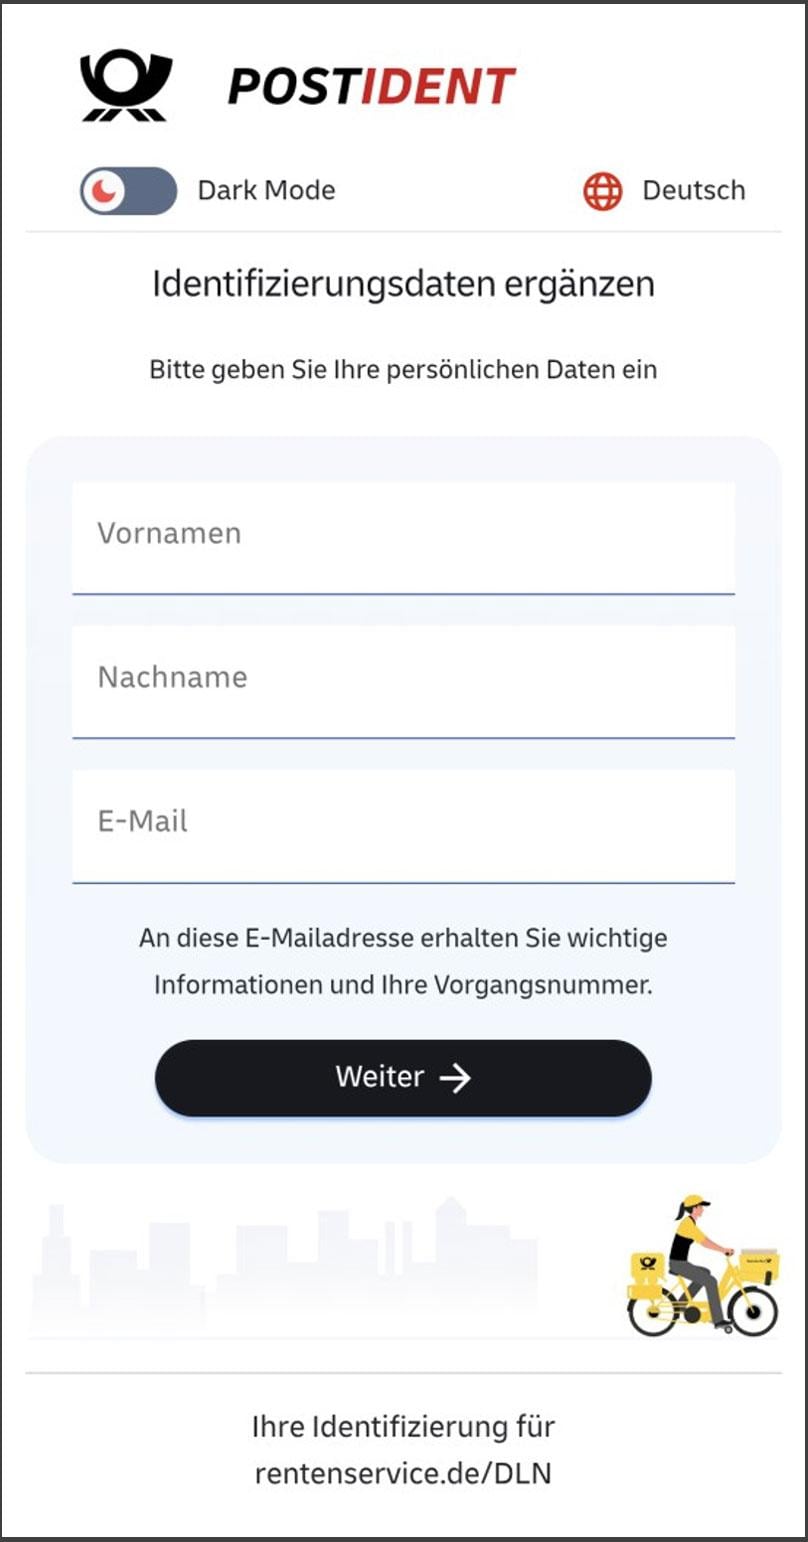
4. Enter data
Enter your first name and last name. Both IDs should be written exactly as shown in your letter "Digital Proof of Life (DLN) 2026" next to the QR code.
Enter an e-mail address where you can receive e-mails. Make sure to spell your e-mail address correctly.
Tap "Next."
-
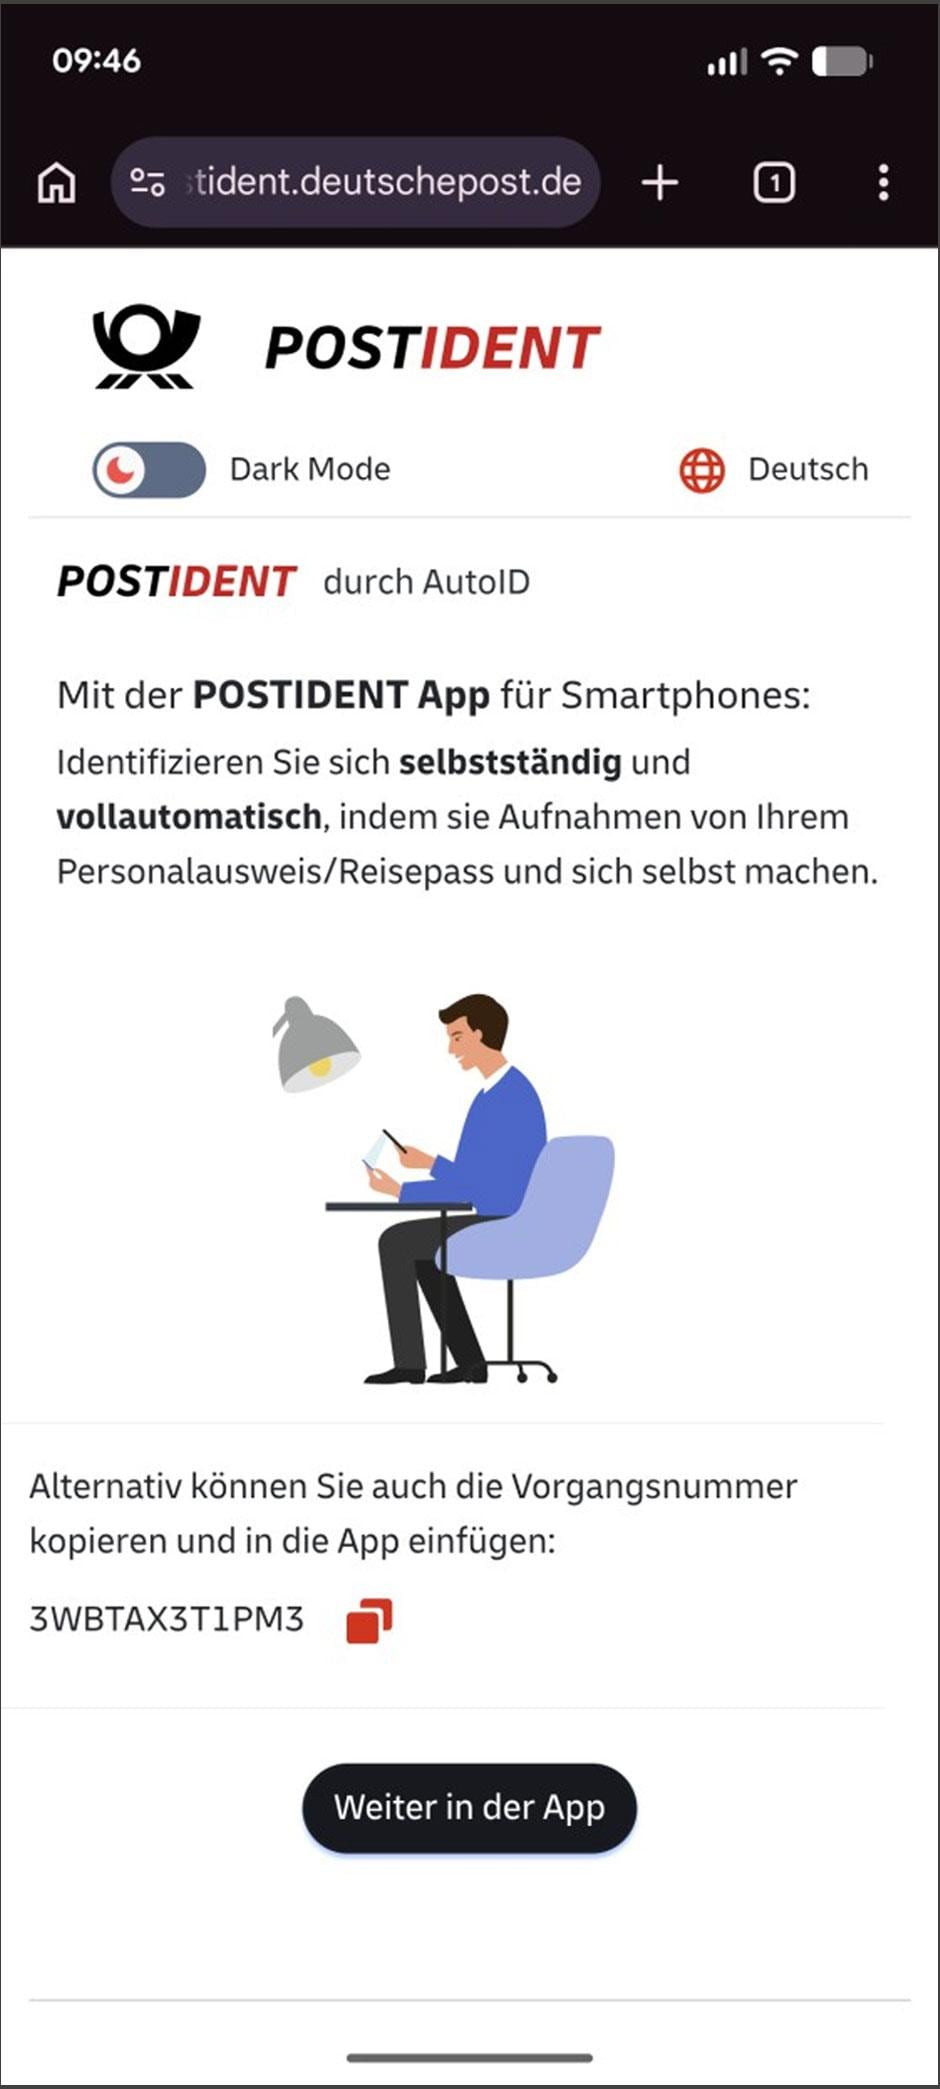
5. 12-digit case number was created
The page "POSTIDENT by AutoID" appears. Copy the case number at the bottom of the page by tapping on the symbol next to it.
Tap on "Continue in the app".
-
-
-
Carry out the identity check with POSTIDENT
-
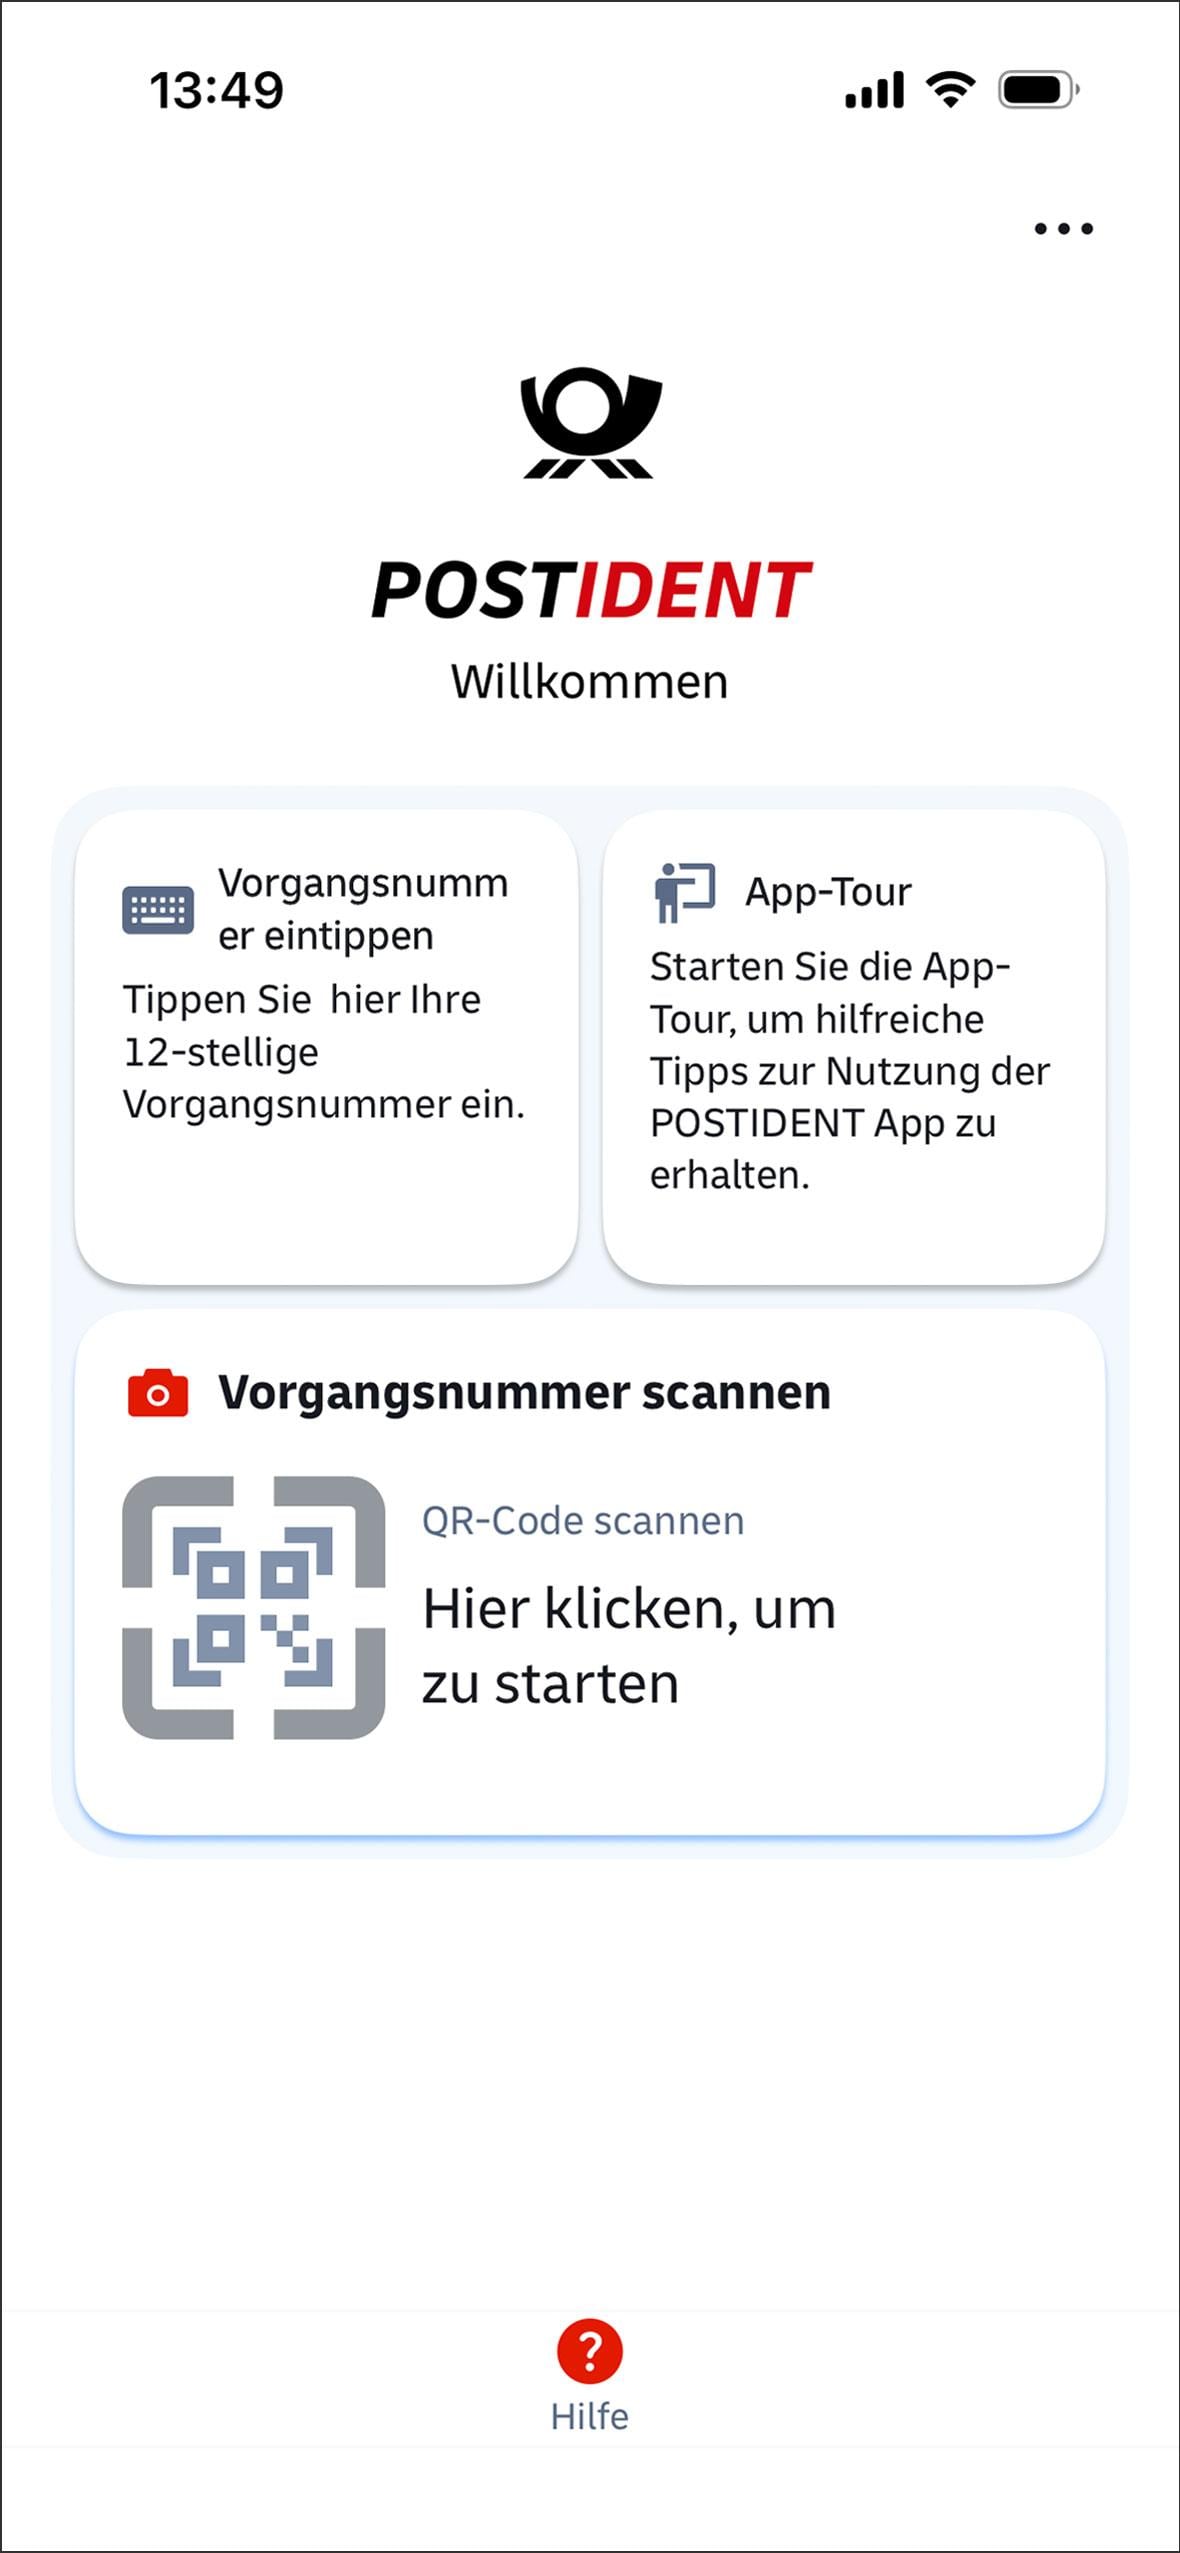
6. Enter transaction number
The transaction number has been transferred from your device to the POSTIDENT app. If you do not see the transaction number, tap on the "Enter case number" field.
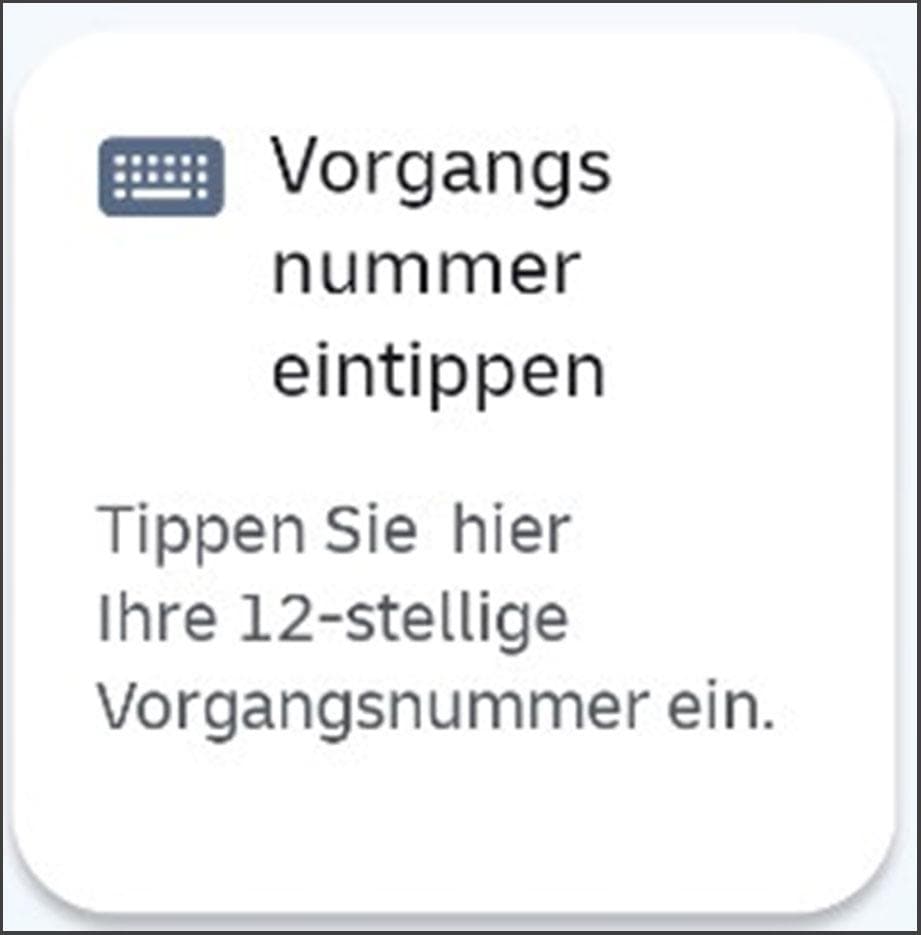
An input field will appear. You can enter the 12-digit case number there.
Tap on "Send".
Please do not use the "Scan case number" function.
If you are unable to proceed:
Check your e-mail inbox, where you will find an e-mail from no-reply@deutschepost.de containing your transaction number.
Enter the case number in the app. Check your spam folder if the e-mail is not in your inbox.
-
7. Begin identity check
You can watch a brief tutorial on the identification process or tap directly on "Start identification."
-
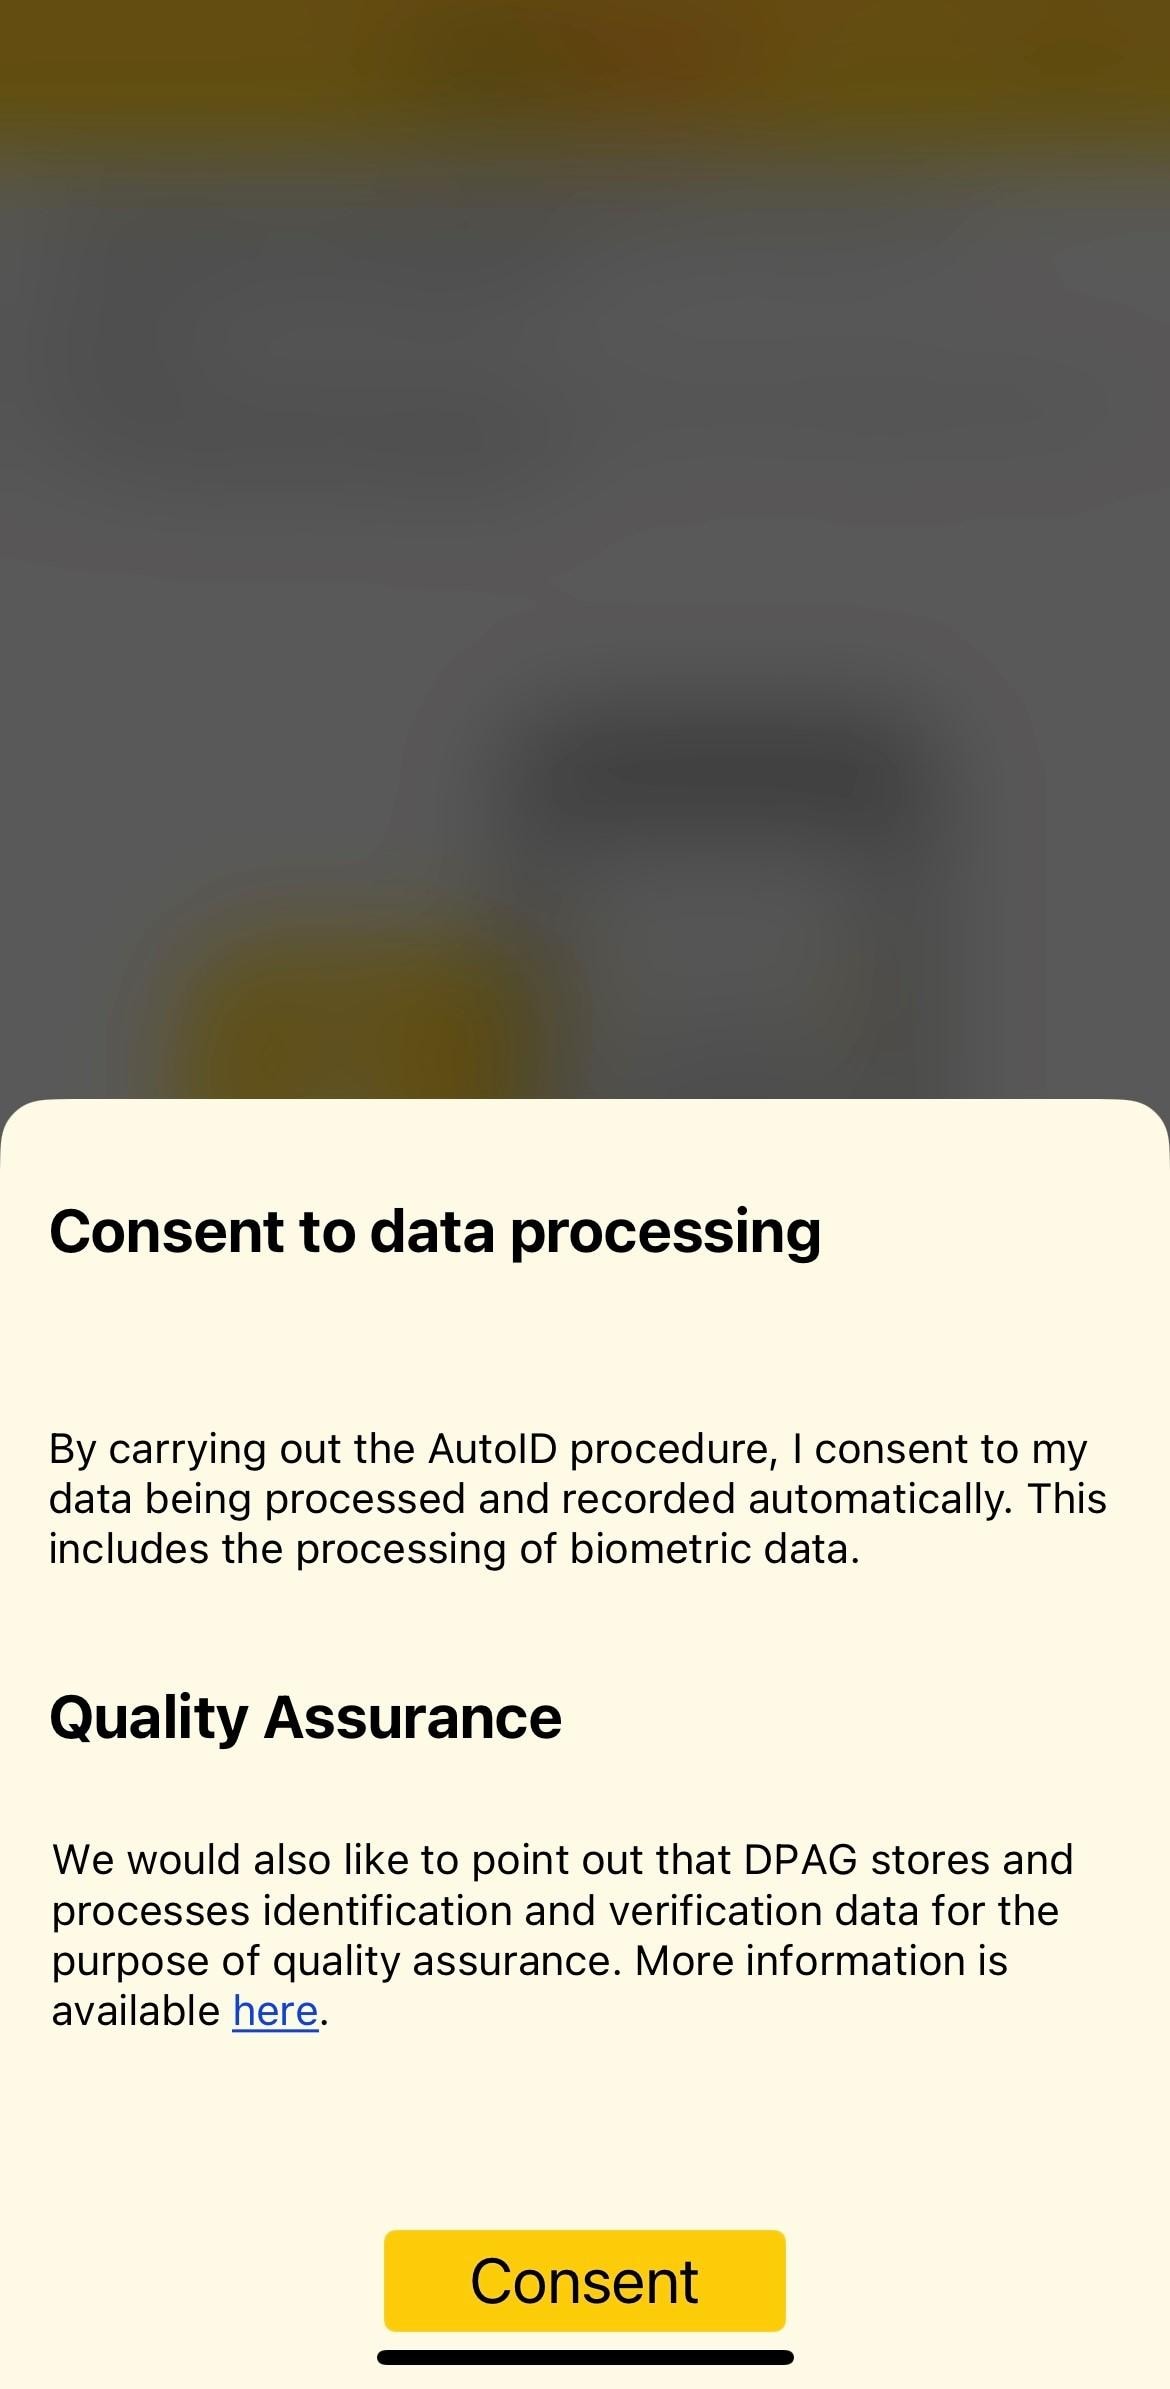
8. Grant permissions.
Tap on "Consent" to agree to the processing of your data.
-
9. Carry out identity check
The app guides you step by step through the identification process:
- Select your ID document.
- Take various pictures of your ID document and your face.
-
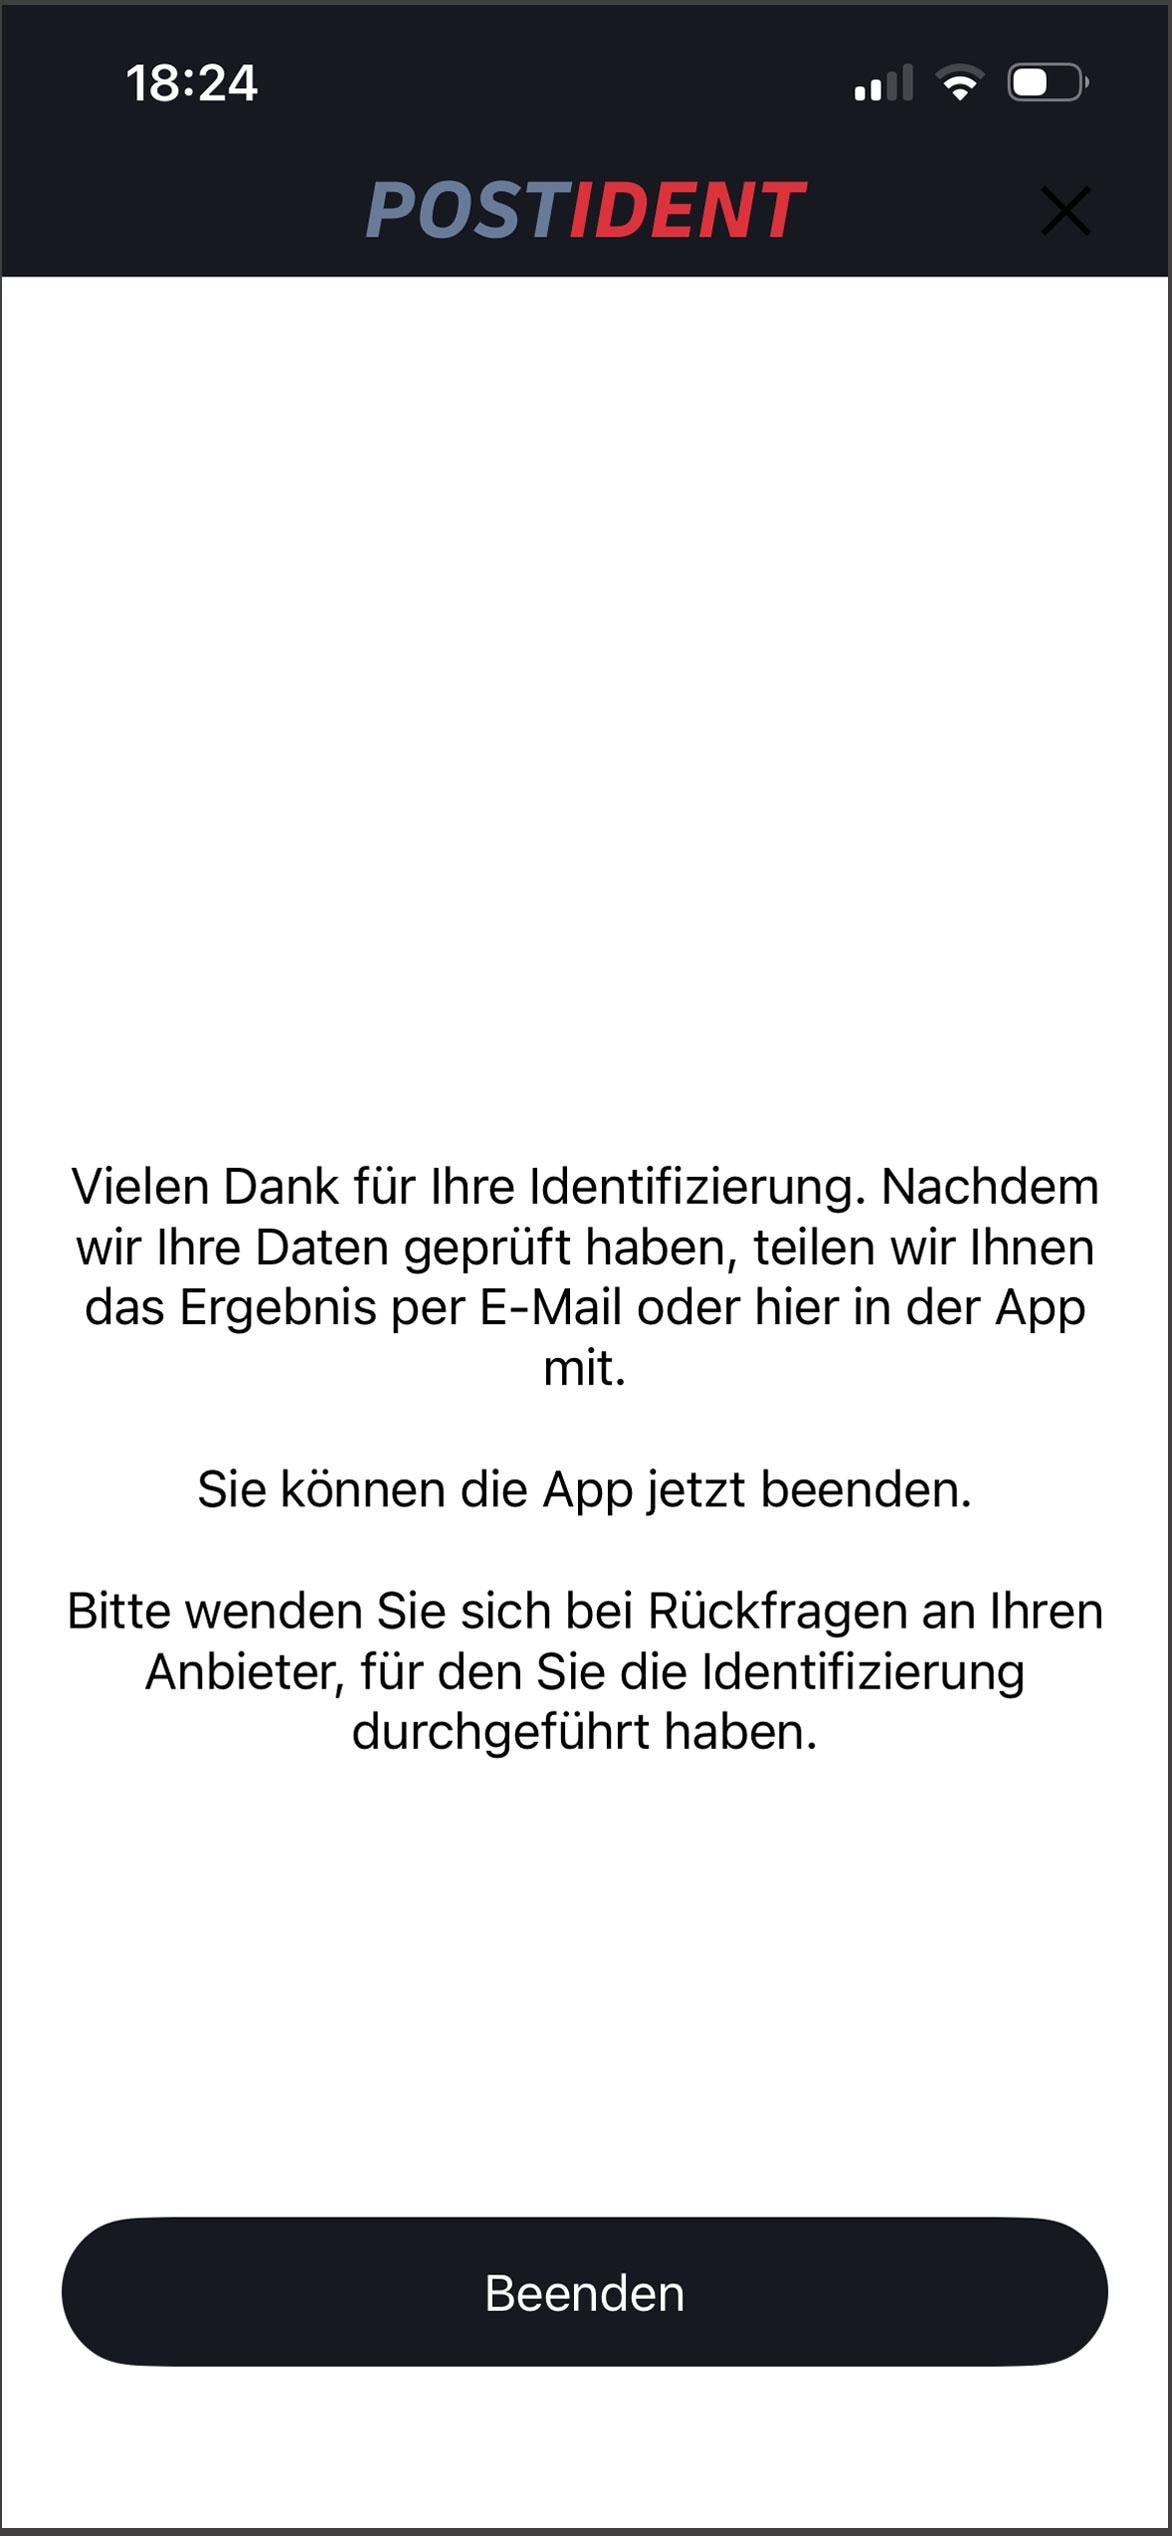
10. Review the data
You do not need to wait. Tap on "Exit."
POSTIDENT will now verify whether your identity check was successful.
-
-
Result of the identity check with POSTIDENT
POSTIDENT will usually notify you of the identity check result within 24 hours. You will receive the result by e-mail (please also check your spam folder) and in the app:
Positive message: "Passed."
Negative message: "Repeat identity check with POSTIDENT." Use your case number again.
-
Proof of life for Renten Service
POSTIDENT will automatically send a positive identity check result to Renten Service.
No further action is required on your part.